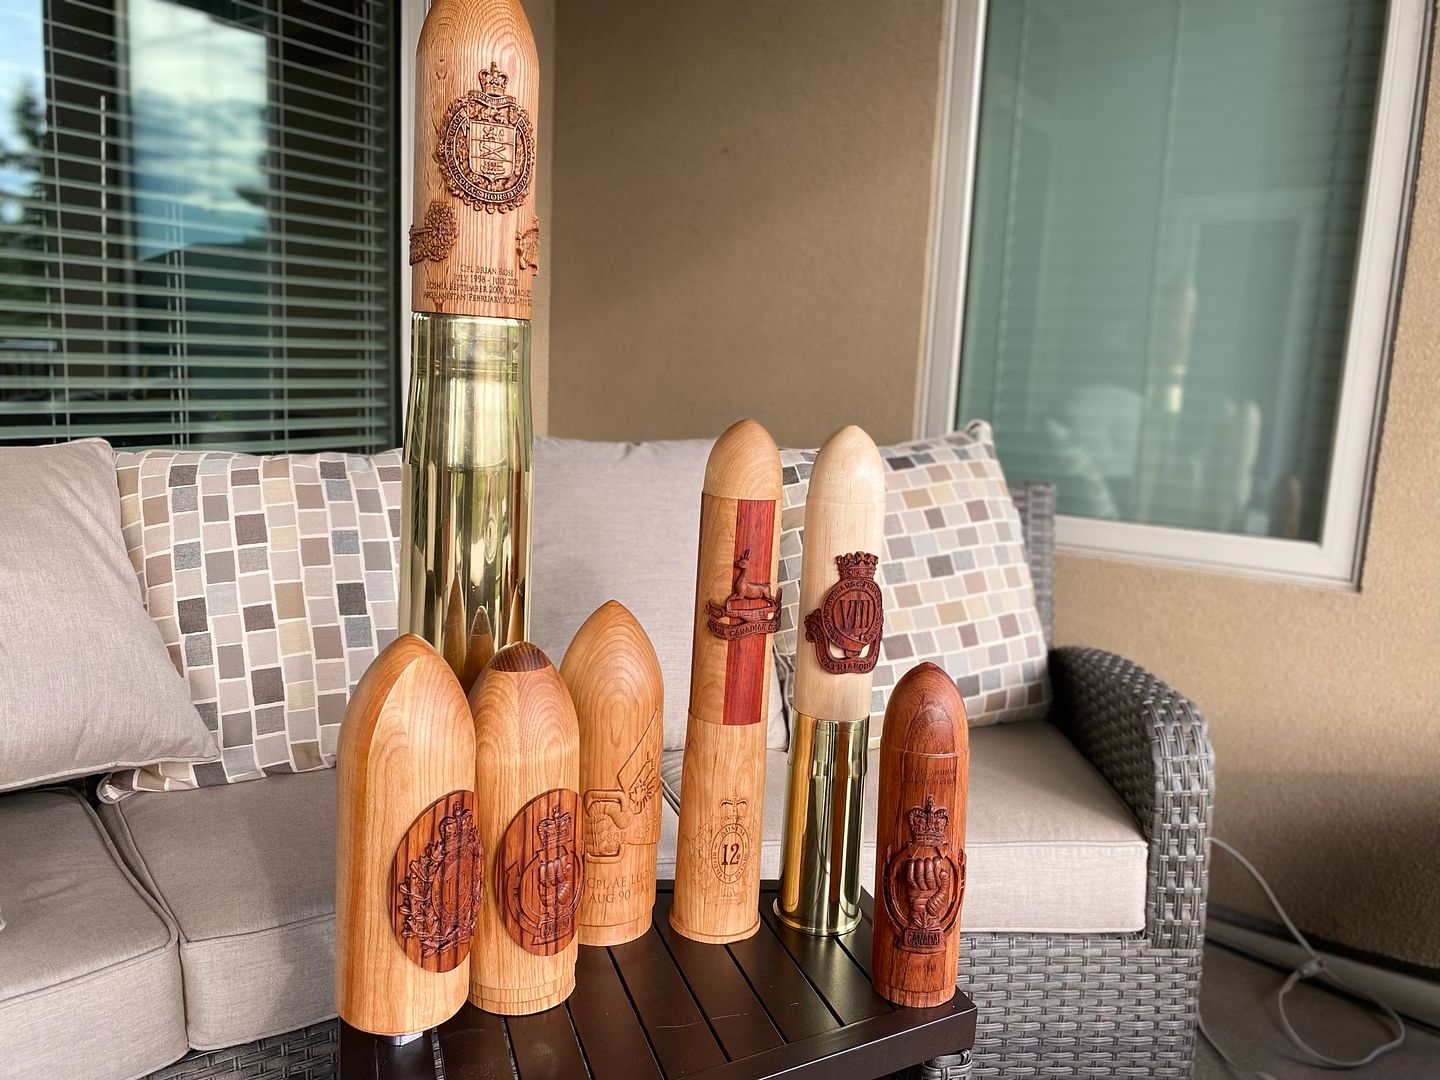
Hi all. I've been working like Dr Frankenstein lately, which is to take my main money maker, carving military unit crests (usually as plaques, but also on cribbage boards), and transfer that over to the 4th dimension, er, axis! To that end, I decided to make replica tank rounds (the pointy part), 105mm and 76mm HESH (high explosive squash head) from the armour vehicles that were in service while I served in the Canadian military from '88 - '08: the Leopard tank (105mm) and the Cougar AVGP (76mm).
This ended up taking WAY more brain power and trial and error than I expected, but it was fairly satisfying to see it go from a basic concept in my head, and end up with some nice pieces.
The piece that is 3rd from the right was an experiment, in 2 parts: 1) to glue up different types of woods, both for an interesting look, and also to save (in theory) time and wood, as well as to 2) make a replica of the 76mm brass casing, for people that never received one while they were serving (in practice, it is unlawful to remove these from the range, but many soldiers received them as gifts from their unit when they departed, as well as it was customary to receive the first casing that one fired on their gunner's course).
My main focus was to make the tank rounds out of one piece of wood (laminated boards, both 4/4 and 8/4), but I also wanted to be able to make them 2 piece (main head in one wood type, and the crest in another). This was for 3 reasons: 1) aesthetics, 2) I can make the heads MUCH faster if they are plain, and I can create a stock-pile in different types of wood (maple, cherry, and white oak are my primary woods) and then carve out the crest in whichever wood type the customer wants (exotics, contrasting (walnut crest on a maple body, for example), etc) and then affix it just prior to finishing the piece, and 3) I made a few mistakes on my first few attempts (usually the crests got messed up, due to losing steps or not indexing the A-axis zero point accurately enough (so the finish pass(es) were slightly off, ruining the crest). I didn't want to throw those pieces out, so I milled off the damaged crest, and voila! A perfectly useful plain head (that can get a crest attached to it, as per step 2), rather than a fairly expensive piece of fire wood (the 105mm heads use about 4 board feet of wood (going from the lumber yard to glue up to finished piece).
Working in the 4th dimension (so to speak) was quite challenging, since everything has to be thought out and processed differently (my old computer takes forever to process the toolpaths, and my new gaming desktop isn't that much better (granted, I use the highest settings, so there's that). There was a LOT of trial and error to get the most efficient toolpaths, since the stepper motor for the rotary axis is VERY weak (it can easily be turned by hand, and if one is too aggressive with depth-of-cut, it WILL lose steps, thereby ruining the whole piece). As well, there are some differences in the way one needs to set x0yo and z0, and more often than not, the A0 gets thrown off very easily. One step I have learned to take is to have the piece (and the A0) set off the flat part of one of the faces (nearest the rotary axis main body) and use a digital level (the small magnetic type that you can use to set table saw blade angle, for example) and always ensure that it's set to 0 degrees (both on the piece of wood, as well as the controller). Being off by even 1 degree can have implications (I use a larger taper ball nose to do the majority of the head, and a very small (1/32" r) TBN for the crest).
Anyway, if anyone has questions, feel free to fire away (pun!).
Allan
