Most of my pictures are on my phone, so I'm looking to see what I have on my computer.
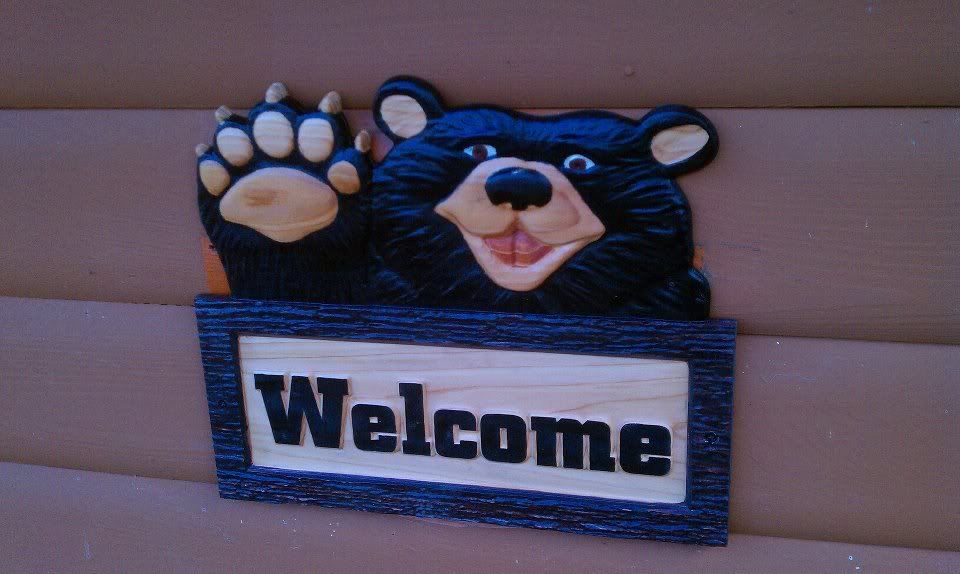
This is the welcome sign I did for our house. I had hoped that it would cover where the old sign was when we bought the house, but it didn't. We have a log home that someone painted and the paint needs to come off, so it will all be good eventually.
I used cedar on this one. I originally wasn't planning on using any kind of finish on it, but decided it looked a little too plain in the unfinished version. I used some different stains on the frame and mouth and some different paint markers on the rest. Then I sprayed the whole thing with polyurethane.
Thanks, I downloaded the same 3D and run it on plywood. It came out Nice now I have to sand it and paint. But I like the look of that one You did!! Time to fireup the old Woodmize and cut some cedar. Good Job
The only thing I would do differently would be to use a lighter color stain on the frame part. I had black cherry sitting in front of me when I was working on it so that's what I used. By the way, that is sawdust on his nose, I didn't even realize it was there until I looked at the picture. LOL
Beautiful!! I'm planning on doing one of these for my friend. I'm confused however on the text you have added. Are the letters raised and how did you do that. Isn't the area with the text already below the surface from the .v3m file?
Lameiii wrote:Beautiful!! I'm planning on doing one of these for my friend. I'm confused however on the text you have added. Are the letters raised and how did you do that. Isn't the area with the text already below the surface from the .v3m file?
I loaded it into V-Carve, added the text and outlined the recessed area and then created a v-carve toolpath. The face of the text starts at where the .v3m file ends.
Being a newbie I'm still a little confused. After you created the text then did you use a pocket cut around the letters?
I'm learning more ever day but I can see I have a long way to go.
You got it Jim, save it from Cut3D, import it into VCarve, use the rectangle tool to outline the area, create your text, use the "V-Carve / Engraving toolpath" and select the "Use flat area clearance tool" to make the pocket around the text.
My sign is about 18" wide, which makes it pretty thin in the text area. I used a start depth of .3" and a flat depth of .15" and it turned out pretty good. You'll have to adjust that according to the size of your piece.