1/4 twist baluster suggestion
- ohiolyons
- Vectric Wizard
- Posts: 1714
- Joined: Wed May 27, 2009 7:16 pm
- Model of CNC Machine: Laguna IQ
- Location: Kettering, Ohio
1/4 twist baluster suggestion
So I've been trying Wrapping Spiral Layout and not getting very far. I'm looking for suggestions on how to proceeed.
Thanks in advance.
John
John Lyons
CNC in Kettering, Ohio
Re: 1/4 twist baluster suggestion
I'm so used to using other cad programs, I don't know if this could be done in Aspire or not. I attached a zip file of a twisted rail stl model which took just a few seconds in Rhino. Once you imported it, you can adjust the size if needed.
Gary
Gary
- Attachments
-
- twisted rail.zip
- (332.94 KiB) Downloaded 179 times
- Rcnewcomb
- Vectric Archimage
- Posts: 5927
- Joined: Fri Nov 04, 2005 5:54 am
- Model of CNC Machine: 24x36 GCnC/WinCNC with ATC
- Location: San Jose, California, USA
- Contact:
Re: 1/4 twist baluster suggestion
If I have to make a lot of these I'd hand code it. This could be done as a side-cut with a long end mill. Just run the length of the blank while rotating 90 degrees, rinse and repeat.
- Randall Newcomb
10 fingers in, 10 fingers out, another good day in the shop
- ohiolyons
- Vectric Wizard
- Posts: 1714
- Joined: Wed May 27, 2009 7:16 pm
- Model of CNC Machine: Laguna IQ
- Location: Kettering, Ohio
Re: 1/4 twist baluster suggestion
i'm still hoping to do it in Aspire.
Next I was going to try Sketchup and import it.
I'll update later on:
1 aspire progress
2 the rhino import
3 attempt
Next I was going to try Sketchup and import it.
I'll update later on:
1 aspire progress
2 the rhino import
3 attempt
John Lyons
CNC in Kettering, Ohio
Re: 1/4 twist baluster suggestion
Randall's method would be the most efficient one. If you would like to do it in Aspire, you could follow this guide:
https://docs.vectric.com/docs/V9.5/Aspi ... ted-shapes
I think you would just need to use square instead of star and reduce the number of revolutions.
I hope it helps,
Greg K.
https://docs.vectric.com/docs/V9.5/Aspi ... ted-shapes
I think you would just need to use square instead of star and reduce the number of revolutions.
I hope it helps,
Greg K.
-
- Vectric Wizard
- Posts: 724
- Joined: Sun Jun 16, 2013 4:40 am
- Model of CNC Machine: Home Built 4-axis Router
- Location: Fort Collins, CO
Re: 1/4 twist baluster suggestion
I made similar twisted table legs a couple of years ago but designed them in separate 3D CAD (as a "loft" body) and imported that. That allowed also radiused edges, varying diameter and a "foot" bulb at the end. Back then VcarvePro did not have good 3D rotary options and I used a different CAM software but nowadays I would use VcarvePro or Aspire for that.
While rotary cutting a 3d model usually takes a lot of time, I got that quite reasonable since I did not rough all around but only narrow start slots and then went full depth with a ballnose for a finely stepped finish cut. Forgot how long exactly but probably less than 30 minutes per leg.
Table Leg Video
-
- Vectric Wizard
- Posts: 1717
- Joined: Sun Sep 23, 2012 12:14 pm
- Model of CNC Machine: CNC Shark Pro, Probotix Meteor 25" x 50"
Re: 1/4 twist baluster suggestion
Hope this helps. Start with a cylinder that is large enough to surround the square section of the baluster. Use 1/4 of the circle as the shape and 4 diagonal lines as the drive rails in the moulding toolpath. I had to flatten the arc a bit to end up with relatively flat sides for the twisted baluster shape.
4D
4D
- Attachments
-
- Quarter Twist 4D.crv3d
- (248.5 KiB) Downloaded 183 times
- ohiolyons
- Vectric Wizard
- Posts: 1714
- Joined: Wed May 27, 2009 7:16 pm
- Model of CNC Machine: Laguna IQ
- Location: Kettering, Ohio
Re: 1/4 twist baluster suggestion
Very close, 4Dthinker but I see flat spots on the corners.
I'm going to Focus on Greg's suggestion.
I'll report back
I'm going to Focus on Greg's suggestion.
I'll report back
John Lyons
CNC in Kettering, Ohio
- dhellew2
- Vectric Wizard
- Posts: 1326
- Joined: Thu May 22, 2008 10:14 pm
- Model of CNC Machine: Legacy Artisan 72 and AVID CNC Rotary
- Location: Royal City Washington
Re: 1/4 twist baluster suggestion
These are best made with a profile cut using a profile bit.
It would only take about 10 lines of code to create.
A three start cut only takes 12 lines of code.
Dale
It would only take about 10 lines of code to create.
A three start cut only takes 12 lines of code.
Dale
You will get old if you live long enough!
Young = time, no money
Old = money, no time
Dale
Young = time, no money
Old = money, no time
Dale
- ohiolyons
- Vectric Wizard
- Posts: 1714
- Joined: Wed May 27, 2009 7:16 pm
- Model of CNC Machine: Laguna IQ
- Location: Kettering, Ohio
Re: 1/4 twist baluster suggestion
gregk wrote:Randall's method would be the most efficient one. If you would like to do it in Aspire, you could follow this guide:
https://docs.vectric.com/docs/V9.5/Aspi ... ted-shapes
I think you would just need to use square instead of star and reduce the number of revolutions.
I hope it helps,
Greg K.
Greg got the 1/4 twist I was looking for!
But I'm missing the part of the imported component that is wider than the rotary job.
any insights?
The file is too large for this website. what is the prefered way to send it to you?
John
John Lyons
CNC in Kettering, Ohio
Re: 1/4 twist baluster suggestion
Hi John,
You could upload it to e.g. Dropbox and share a link here if you don't mind.
Greg K
You could upload it to e.g. Dropbox and share a link here if you don't mind.
Greg K
- Rcnewcomb
- Vectric Archimage
- Posts: 5927
- Joined: Fri Nov 04, 2005 5:54 am
- Model of CNC Machine: 24x36 GCnC/WinCNC with ATC
- Location: San Jose, California, USA
- Contact:
Re: 1/4 twist baluster suggestion
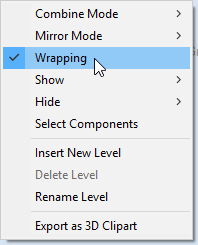
Just above the bookmark in the tutorial Greg provided it talks about turning on Wrapping for the level. As can be seen, the strip disappears as soon as it leaves the material boundaries. In order to make it wrap around, we need to create a new level in the component tree and move the texture component into it. Then right click on the newly created level and right click. From the pop-up menu select wrapping. After that wrapping will occur.But I'm missing the part of the imported component that is wider than the rotary job.
Note: Wrapping can be enabled on any level in component tree and combined with mirror mode. If the level wraps on itself, then intersecting areas will be merged regardless of level's combine mode. If it is desired to create e.g. a woven pattern, then place left-hand spiralled component and right-hand spiralled components in different separate levels, both with wrapping enabled.
- Randall Newcomb
10 fingers in, 10 fingers out, another good day in the shop
- ohiolyons
- Vectric Wizard
- Posts: 1714
- Joined: Wed May 27, 2009 7:16 pm
- Model of CNC Machine: Laguna IQ
- Location: Kettering, Ohio
Re: 1/4 twist baluster suggestion
That did it! I confused Level and Layer AGAIN!!!!!!!!!!!!!!
I wish they had come up with different names for those two!!!
John Lyons
CNC in Kettering, Ohio
Re: 1/4 twist baluster suggestion
Hi John,
I'm glad it worked out for you. Keep in mind that since you need a 3D Finish toolpath it will take quite long to cut it.
I think you can attempt to apply Randall's method within Aspire as well. You can select one of your rails and copy it 5 times along Y axis (using Copy Along Vectors tool, so they are spaced out automatically for you).
Then remove the one on the top. Now you can select a 2 inch end mill and do a profile cut on those vectors, with cut depth 1 - 0.5 * square root(2). Like this: .
Unfortunately, this an edge case for the rotary preview - if you attempt to simulate it, you will see this: Preview indicates that the blank will be rounded, but that obviously would not be a case in the real world.
To get a rough approximation of how it would look like, you can swap end mill for ball nose (for simulation only).
This will get you something like this: That looks more like it.
Although you can't really rely on preview in this case, it is worth considering since it can save you a lot of time.
Randall, what do you think of this? Will it work as expected?
Greg K