Made this edge lit sign as a donation for my daughters dance class fundraiser. A little different take on the norm. So hard to get a good picture of edge lit signs though.
Edge Lit Silhouette
-
- Vectric Wizard
- Posts: 413
- Joined: Wed Jul 09, 2014 1:19 am
- Model of CNC Machine: CRP Pro 4848 Custom Build
- Location: Drumheller, Alberta, Canada
- Contact:
Edge Lit Silhouette
Connor Bredin
Distinctive Dimensional Concepts Ltd.
www.distinctive-concepts.ca
Distinctive Dimensional Concepts Ltd.
www.distinctive-concepts.ca
-
- Posts: 28
- Joined: Thu Feb 08, 2018 3:58 am
- Model of CNC Machine: Axiom A8 Pro+
- Location: PacNW 98367
- Contact:
Re: Edge Lit Silhouette
Good Dad...Nicely done...especially impressed with your attention to the detailing of the hidden parts in both the projects...
- carbidetooth
- Vectric Apprentice
- Posts: 59
- Joined: Mon Apr 09, 2018 8:01 am
- Model of CNC Machine: ShopSabre Pro 408
Re: Edge Lit Silhouette
Impressive. I'm a newbie to CNC, kinda get how edge lighting works, but am clueless as to how you get different colors to illuminate specific parts. Would love to hear the technical details if you're willing.
Thanks, Peter
Thanks, Peter
-
- Vectric Wizard
- Posts: 413
- Joined: Wed Jul 09, 2014 1:19 am
- Model of CNC Machine: CRP Pro 4848 Custom Build
- Location: Drumheller, Alberta, Canada
- Contact:
Re: Edge Lit Silhouette
Thanks.ricphoto wrote:Good Dad...Nicely done...especially impressed with your attention to the detailing of the hidden parts in both the projects...
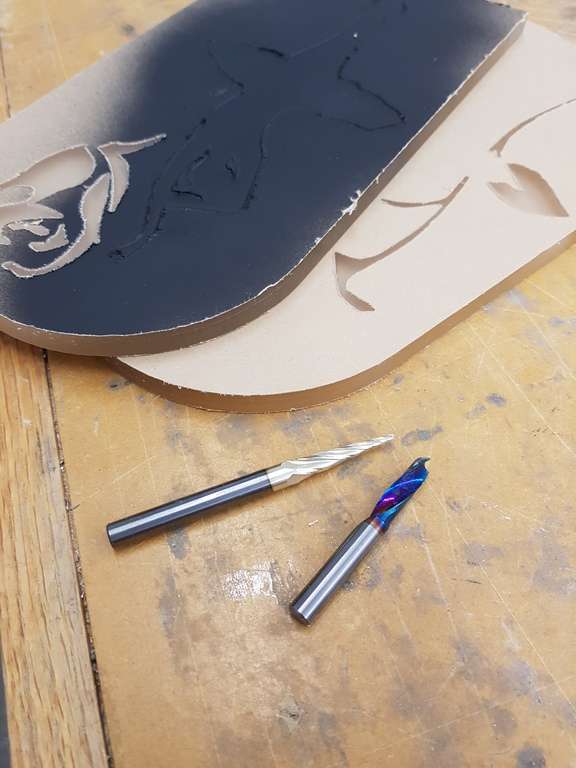
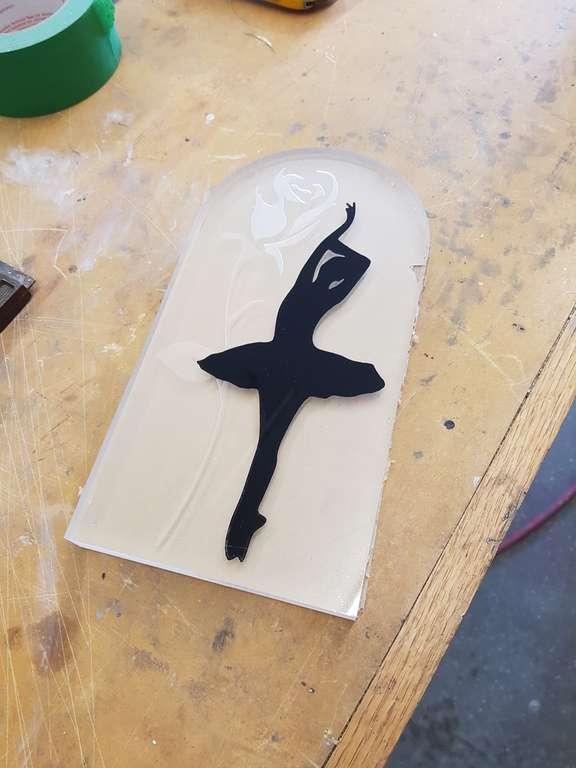
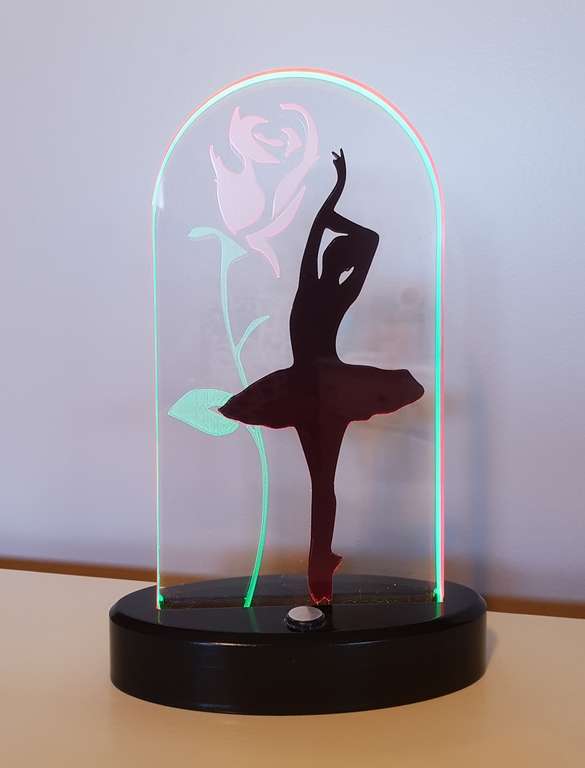
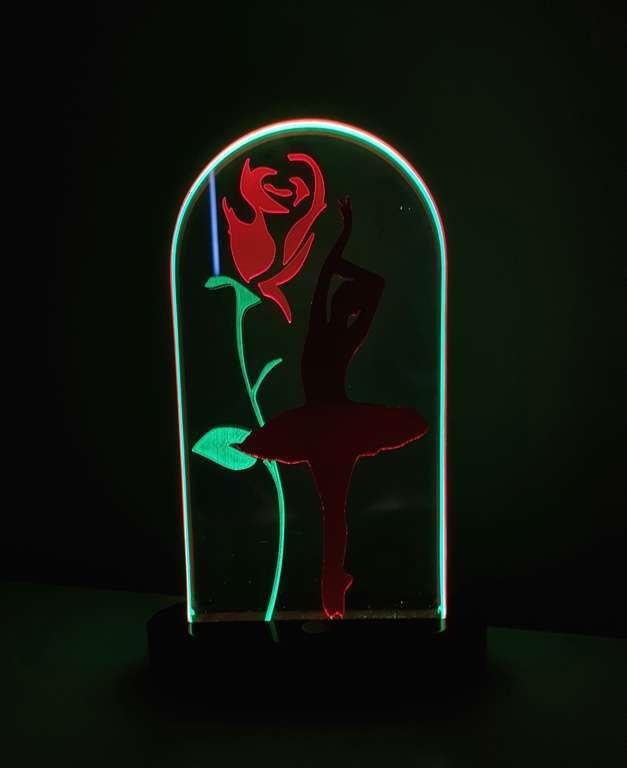
Hi Peter. For a two color edge lit, you need to use two acrylic panels.carbidetooth wrote:Impressive. I'm a newbie to CNC, kinda get how edge lighting works, but am clueless as to how you get different colors to illuminate specific parts. Would love to hear the technical details if you're willing.
Thanks, Peter
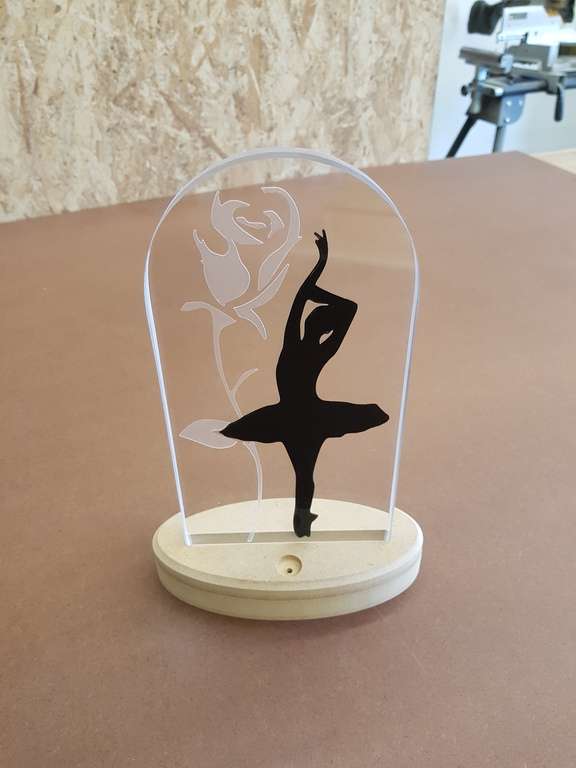
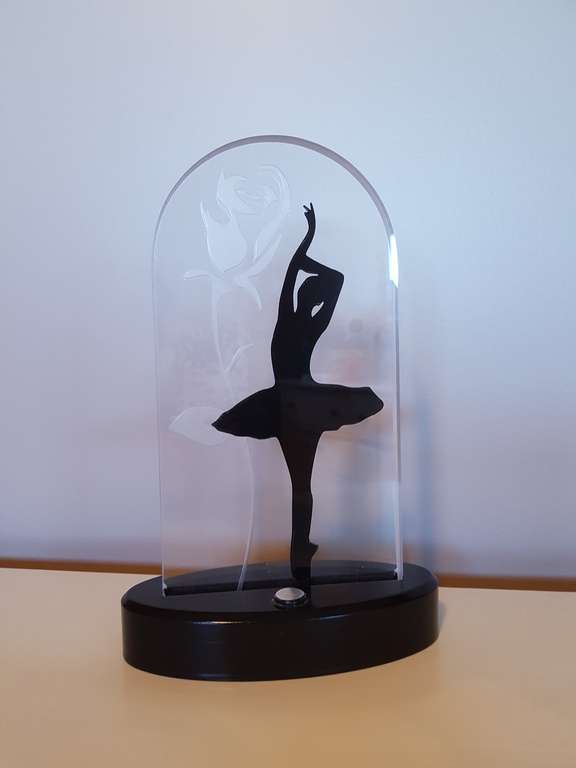
On the first panel you engraving everything you want to be the first color. In this case it would be the rose and the dancer. Make sure to mirror the first images, so that it is engraved on the back side of the acrylic and you maintain the smooth front. I also painted the dancer black, as in this case the intended effect was a silhouette.
On the second panel you engrave everything you want to be the second color. In this case, the rose stem. This engraving is NOT mirrored, so it cuts on the front of the acrylic and leaves a smooth back when the two pieces are put together.
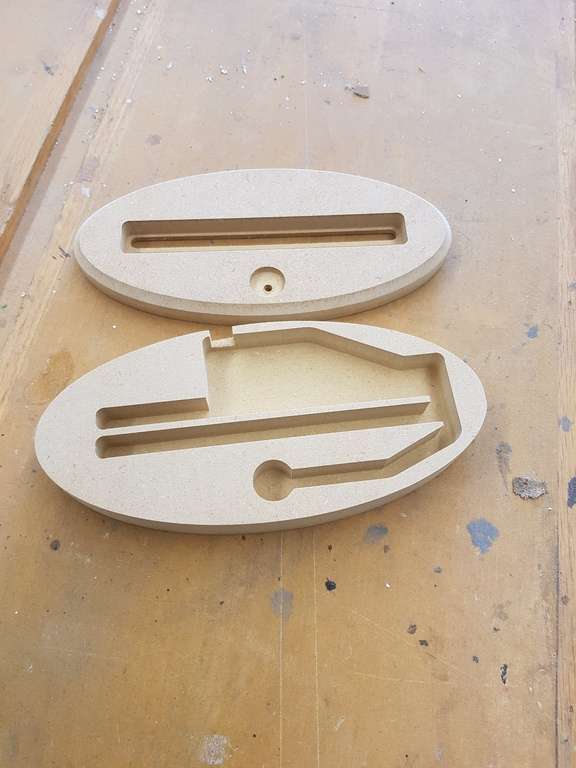
I make a 2 part base. The top part has a slot wide and long enough to fit the two pieces of acrylic in with a friction fit. It also has a divider in the middle, and a ledge on the outside of the pocket which the acrylic will sit on. The middle divider blocks the light from each strip, so they can only shine into the intended piece of acrylic.
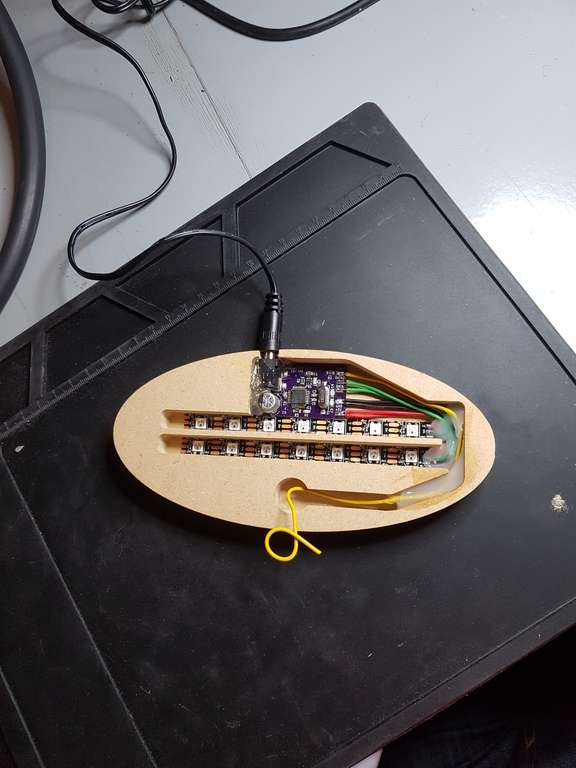
The bottom part contains the electronics. You will need two different colored strips, set in slots so that the LEDs don't overlap each other. These will shine into each panel, giving you a two color effect.
Connor Bredin
Distinctive Dimensional Concepts Ltd.
www.distinctive-concepts.ca
Distinctive Dimensional Concepts Ltd.
www.distinctive-concepts.ca
- carbidetooth
- Vectric Apprentice
- Posts: 59
- Joined: Mon Apr 09, 2018 8:01 am
- Model of CNC Machine: ShopSabre Pro 408
Re: Edge Lit Silhouette
Thanks. That makes perfect sense. I'm assuming that's the driver for LEDs in the pocket. I have some experience with LEDs, but have never encountered individual naked circuit boards. If there's a resource you'd be willing to share, that'd be cool.
At this point, my thirst for knowledge is far outstripping my abilities to produce, but I hope to change that in time.
Again, thanks for sharing your work. It spurs my imagination in a big way.
At this point, my thirst for knowledge is far outstripping my abilities to produce, but I hope to change that in time.
Again, thanks for sharing your work. It spurs my imagination in a big way.
-
- Vectric Wizard
- Posts: 413
- Joined: Wed Jul 09, 2014 1:19 am
- Model of CNC Machine: CRP Pro 4848 Custom Build
- Location: Drumheller, Alberta, Canada
- Contact:
Re: Edge Lit Silhouette
I'm not using typical LEDs. Instead of using single color LEDs, or an analog RGB strip, I'm using digitally addressable LEDs (commonly known as Neopixels). Each LED in the strip can be color controlled individually, allowing full control of the color (and or patterns, depending on the project).carbidetooth wrote:Thanks. That makes perfect sense. I'm assuming that's the driver for LEDs in the pocket. I have some experience with LEDs, but have never encountered individual naked circuit boards. If there's a resource you'd be willing to share, that'd be cool.
At this point, my thirst for knowledge is far outstripping my abilities to produce, but I hope to change that in time.
Again, thanks for sharing your work. It spurs my imagination in a big way.
However, this requires a microcontroller and a little programming knowledge to make work. Something like an Arduino Nano would work for this, and the internet is full of programming examples (Adafruit.com is a good place to both purchase and learn about such things).
The circuit board in mine is of my own design (electronics and circuit board design is a hobby of mine), taylored to my needs at a lower price point than an 'off the shelf' microcontroller board. Also lets me incorporate my ''signature' capacitive touch on/off/mode switch.
Connor Bredin
Distinctive Dimensional Concepts Ltd.
www.distinctive-concepts.ca
Distinctive Dimensional Concepts Ltd.
www.distinctive-concepts.ca
-
- Vectric Wizard
- Posts: 823
- Joined: Tue Jun 01, 2010 4:51 pm
- Model of CNC Machine: CAMaster MC4848
- Location: Prescott AZ
Re: Edge Lit Silhouette
Connor that is some nice work!!
It took a lot of planning and creativity to do that and very special to do it for your Daughters dance class.
Looking at your base shows the planning that went into this project. I had to study it closely to figure out the workings.
Are the two pieces of acrylic just put together and held in place just by the base?
That’s what it looks like to me. How wide is the divider strip in-between the two pieces of Acrylic?
Looks like about 1/8” which would leave 3/16” for the light to get through each piece of acrylic.
I’ve made quite a few of the acrylic signs and they are always fun.
I hope they got a good price for the piece at the fundraiser. I’m sure your daughter was proud of her Dad.
Thanks for posting this wonderful piece.
Mark
-
- Vectric Wizard
- Posts: 413
- Joined: Wed Jul 09, 2014 1:19 am
- Model of CNC Machine: CRP Pro 4848 Custom Build
- Location: Drumheller, Alberta, Canada
- Contact:
Re: Edge Lit Silhouette
MarkJohnston wrote:Connor that is some nice work!!
It took a lot of planning and creativity to do that and very special to do it for your Daughters dance class.
Looking at your base shows the planning that went into this project. I had to study it closely to figure out the workings.
Are the two pieces of acrylic just put together and held in place just by the base?
That’s what it looks like to me. How wide is the divider strip in-between the two pieces of Acrylic?
Looks like about 1/8” which would leave 3/16” for the light to get through each piece of acrylic.
I’ve made quite a few of the acrylic signs and they are always fun.
I hope they got a good price for the piece at the fundraiser. I’m sure your daughter was proud of her Dad.
Thanks for posting this wonderful piece.
Mark
Thanks Mark,
Yes, the divider is about 1/8". That was about as thin as I could make it without it breaking apart.
And you are also correct about the acrylic panels. They are just placed together and stuck in the slot. The slot is tight enough that they hold together quite well.
Connor Bredin
Distinctive Dimensional Concepts Ltd.
www.distinctive-concepts.ca
Distinctive Dimensional Concepts Ltd.
www.distinctive-concepts.ca