Hello,
I have been using Aspire 3.0 and Partworks for about 4 months now.
I have a Shopbot Desktop with a 4th rotary axis and most of my stuff is done using the indexer.
If I have to do a small 0.045" square inlay around the piece in 6 different spots I have to do all sorts of math to calculate distance, spacing, etc. I am just about ready to give up on the software since Mastercam, other software have better features.
All would like to know is if there is a way to tell the software to put that square, dot, diamond or whatever inlay I want every 60 degrees or any other angle and this way I dont have to waste countless hours around my calculator.
Thanks for any help you might be able to provide.
How to use and setup rotary angles
-
Guerra Cues
- Posts: 13
- Joined: Sat Nov 26, 2011 6:13 am
- Model of CNC Machine: Shopbot Desktop
-
Jeff E.
- Vectric Apprentice
- Posts: 79
- Joined: Sat Dec 31, 2005 1:56 pm
- Location: Southern Arizona, USA
Re: How to use and setup rotary angles
Try 'array copy'. From the sound of what you are trying to do it will help you out
Jeff
Jeff
-
Guerra Cues
- Posts: 13
- Joined: Sat Nov 26, 2011 6:13 am
- Model of CNC Machine: Shopbot Desktop
Re: How to use and setup rotary angles
Jeff E. wrote:Try 'array copy'. From the sound of what you are trying to do it will help you out
Jeff
Hey Jeff,
I've tried that and it does not work. It puts all the vectors copied all over the place.
Array copy works if I tell a certain distance in inches or mm. That's about it.
-
tmerrill
- Vectric Wizard
- Posts: 4797
- Joined: Thu May 18, 2006 3:24 pm
- Model of CNC Machine: ShopBot
- Location: North Carolina
Re: How to use and setup rotary angles
I don't do rotary, but after watching one of the tutorial videos I came up with this.
Not sure if this is what you are trying to do or not. If it is, I can give you the exact steps I followed.
For the spacing I did use the Array Copy Tool with 1 columm, 6 rows and used the built-in expression evaluator to calculate the spacing. In this case the Wrapper Gadget calculated the material height to be 3.927" so in the Array Copy Tool I used "3.927/6=" (without quotes) in the Y offset input box and then centered the array on the material.
On a different subject, a free upgrade to Aspire has been released. You can get the details here:
http://www.vectric.com/forum/viewtopic.php?f=27&t=12586
I highly recommend you perform the upgrade. Your version of Partworks probably has been upgraded also but you would need to check ShopBot's website or contact ShopBot for that info.
Tim
- Attachments
-
-
Guerra Cues
- Posts: 13
- Joined: Sat Nov 26, 2011 6:13 am
- Model of CNC Machine: Shopbot Desktop
Re: How to use and setup rotary angles
Ido have the upgrade done already. Would love to see your step by step tutorial.tmerrill wrote:I don't do rotary, but after watching one of the tutorial videos I came up with this.
Not sure if this is what you are trying to do or not. If it is, I can give you the exact steps I followed.
For the spacing I did use the Array Copy Tool with 1 columm, 6 rows and used the built-in expression evaluator to calculate the spacing. In this case the Wrapper Gadget calculated the material height to be 3.927" so in the Array Copy Tool I used "3.927/6=" (without quotes) in the Y offset input box and then centered the array on the material.
On a different subject, a free upgrade to Aspire has been released. You can get the details here:
http://www.vectric.com/forum/viewtopic.php?f=27&t=12586
I highly recommend you perform the upgrade. Your version of Partworks probably has been upgraded also but you would need to check ShopBot's website or contact ShopBot for that info.
Tim
-
tmerrill
- Vectric Wizard
- Posts: 4797
- Joined: Thu May 18, 2006 3:24 pm
- Model of CNC Machine: ShopBot
- Location: North Carolina
Re: How to use and setup rotary angles
Not really a tutorial, but info may help.
First, the circled tutorials in the first picture are on your Aspire DVD and contain all the detail. I know from your PM there may be a tapered base so Tutorial #21 would cover that. I used Tutorial #20 for this.
Start Aspire and select the Wrapped Job Setup gadget. I enter an arbitrary length and diameter. See second picture.
Notice how the gadget has calculated the material height that corresponds to the diameter you input in the Wrapped Job Setup. See third picture.
Create your shape and select it. Open the Array Copy tool and look at the setup in the fourth picture. What I have circled is the math expression that will be evaluated to a single value once I press the equal key.
Last picture shows the arrayed shapes selected and the icon you would use to center these in the material is circled.
From here you would calculate the toolpaths and preview it. That is covered very well in the video tutorials so I won't repeat it here.
Tim
- Attachments
-
-
-
-
-
-
Guerra Cues
- Posts: 13
- Joined: Sat Nov 26, 2011 6:13 am
- Model of CNC Machine: Shopbot Desktop
Re: How to use and setup rotary angles
Thanks Tim.
Done all of that. All I was not aware was the calculation you could do on that field. It must be me because I can't get it to work correctly.
In the circular array there is is a setup for angle but it leaves the vectors all over the place.
Done all of that. All I was not aware was the calculation you could do on that field. It must be me because I can't get it to work correctly.
In the circular array there is is a setup for angle but it leaves the vectors all over the place.
tmerrill wrote:Not really a tutorial, but info may help.
First, the circled tutorials in the first picture are on your Aspire DVD and contain all the detail. I know from your PM there may be a tapered base so Tutorial #21 would cover that. I used Tutorial #20 for this.
Start Aspire and select the Wrapped Job Setup gadget. I enter an arbitrary length and diameter. See second picture.
Notice how the gadget has calculated the material height that corresponds to the diameter you input in the Wrapped Job Setup. See third picture.
Create your shape and select it. Open the Array Copy tool and look at the setup in the fourth picture. What I have circled is the math expression that will be evaluated to a single value once I press the equal key.
Last picture shows the arrayed shapes selected and the icon you would use to center these in the material is circled.
From here you would calculate the toolpaths and preview it. That is covered very well in the video tutorials so I won't repeat it here.
Tim
-
mtylerfl

- Vectric Archimage
- Posts: 5892
- Joined: Thu Jan 29, 2009 3:54 am
- Model of CNC Machine: -CarveWright CNC -ShopBot Buddy PRSAlpha
- Location: Brunswick, GA
Re: How to use and setup rotary angles
Hello,Guerra Cues wrote:In the circular array there is is a setup for angle but it leaves the vectors all over the place.
Notice that Tim did not use the Circular Array. You're not aligning anything in a 'circle' - your work space is an unwrapped flat plane so you will be using the Rectangular Array in this case. If you do exactly as Tim instructed, it should work the same at your end.
Michael Tyler
facebook.com/carvebuddy
-CarveWright CNC
-ShopBot Buddy PRSAlpha CNC
facebook.com/carvebuddy
-CarveWright CNC
-ShopBot Buddy PRSAlpha CNC
-
Guerra Cues
- Posts: 13
- Joined: Sat Nov 26, 2011 6:13 am
- Model of CNC Machine: Shopbot Desktop
Re: How to use and setup rotary angles
Hello Michael,mtylerfl wrote:Hello,Guerra Cues wrote:In the circular array there is is a setup for angle but it leaves the vectors all over the place.
Notice that Tim did not use the Circular Array. You're not aligning anything in a 'circle' - your work space is an unwrapped flat plane so you will be using the Rectangular Array in this case. If you do exactly as Tim instructed, it should work the same at your end.
Well using that calculation look at the file and see what I get.
What I really would like is to tell the vector to copy it every 60 degrees like other softwares do, that would save the math headache. See the file and see what you think.
-
tmerrill
- Vectric Wizard
- Posts: 4797
- Joined: Thu May 18, 2006 3:24 pm
- Model of CNC Machine: ShopBot
- Location: North Carolina
Re: How to use and setup rotary angles
The only math you need to do is to figure out how many copies you want around the 360 degree outer circumference. In this case you want 60 degrees of separation between the images, so 360 degrees divided by 60 degrees equals 6 copies.
Now, when you set up the Array Copy tool in Rectangular mode and divide the height of your material by 6 copies, you get exact equal spacing. And then you center the array of 6 copies in the material and the final results should be perfect.
The below picture shows 6 images spaced exactly 60 degrees from each other.
Tim
- Attachments
-
-
Guerra Cues
- Posts: 13
- Joined: Sat Nov 26, 2011 6:13 am
- Model of CNC Machine: Shopbot Desktop
Re: How to use and setup rotary angles
I have posted a corrected file. I forgot to press the = key, I guess it might make a difference 
Another question comes up because of the ringwork I do. I have 2 veneers kind of close together and I would like to calculate the correct angle 15 degrees. Then I can use the calculation posted on this thread and that will work like a dream
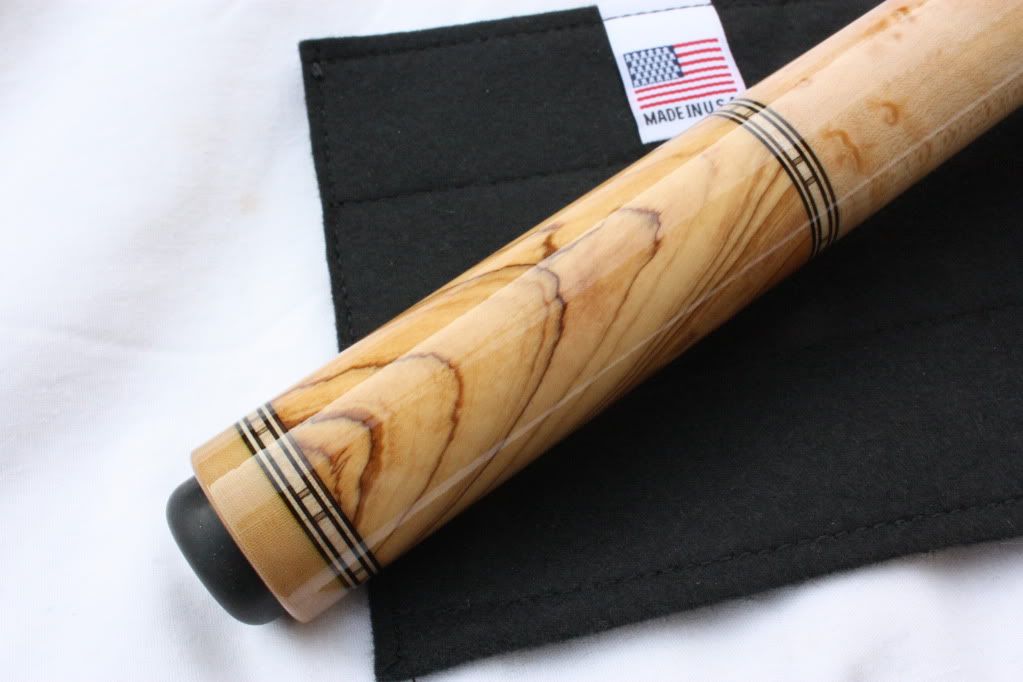
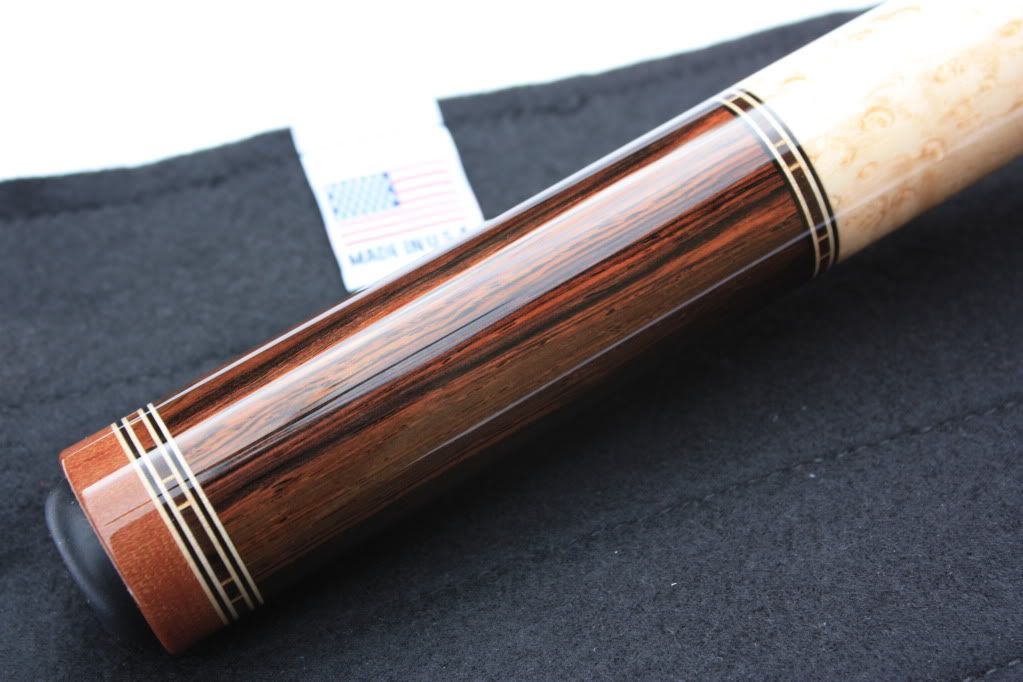
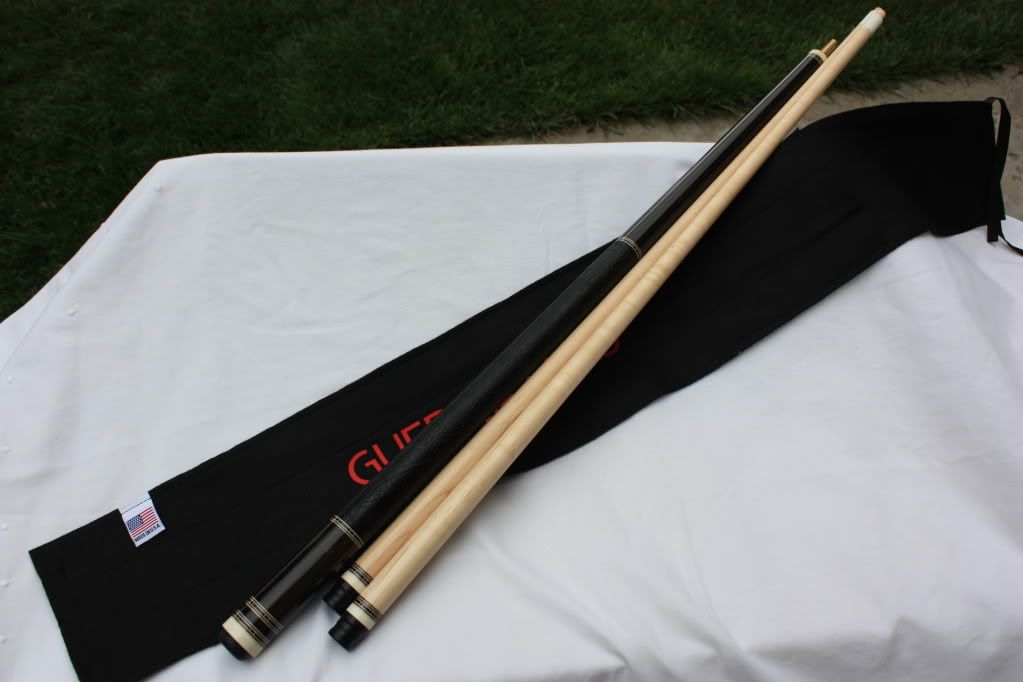
Here is an example of the ringwork I am referring to:
First cue is olivewood and a nice light bem and the other is bem and brazilian rosewood.
Another question comes up because of the ringwork I do. I have 2 veneers kind of close together and I would like to calculate the correct angle 15 degrees. Then I can use the calculation posted on this thread and that will work like a dream
Here is an example of the ringwork I am referring to:
First cue is olivewood and a nice light bem and the other is bem and brazilian rosewood.
-
tmerrill
- Vectric Wizard
- Posts: 4797
- Joined: Thu May 18, 2006 3:24 pm
- Model of CNC Machine: ShopBot
- Location: North Carolina
Re: How to use and setup rotary angles
You do beautiful work!
I'm not sure exactly what has to be 15 degrees apart, but the procedure would be the same. You would divide the available 360 degrees by 15 and that would yield 24 segments. Now set up the Array Copy Tool like before, but divide the material width by 24 and that will determine the spacing between each of the 24 segments. Center that array of 24 segments in your material and it should work.
Tim
-
Guerra Cues
- Posts: 13
- Joined: Sat Nov 26, 2011 6:13 am
- Model of CNC Machine: Shopbot Desktop
Re: How to use and setup rotary angles
I got it Tim. I messed up like I said above. My apologies.tmerrill wrote:The only math you need to do is to figure out how many copies you want around the 360 degree outer circumference. In this case you want 60 degrees of separation between the images, so 360 degrees divided by 60 degrees equals 6 copies.
Now, when you set up the Array Copy tool in Rectangular mode and divide the height of your material by 6 copies, you get exact equal spacing. And then you center the array of 6 copies in the material and the final results should be perfect.
The below picture shows 6 images spaced exactly 60 degrees from each other.
Tim
It is so freaking easy that even a monkey can do it.
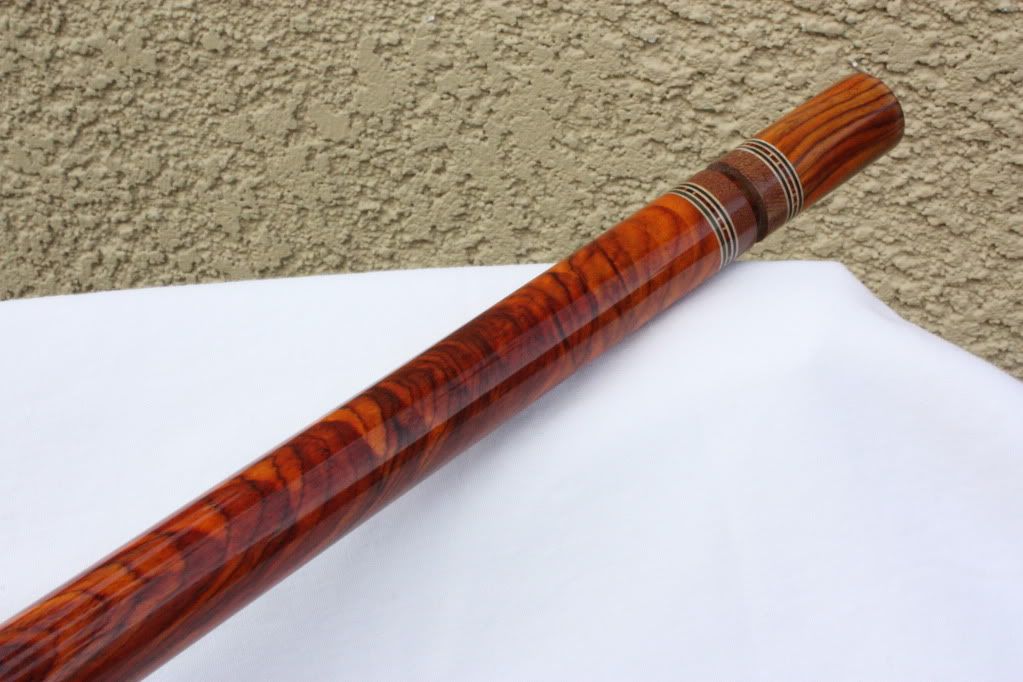
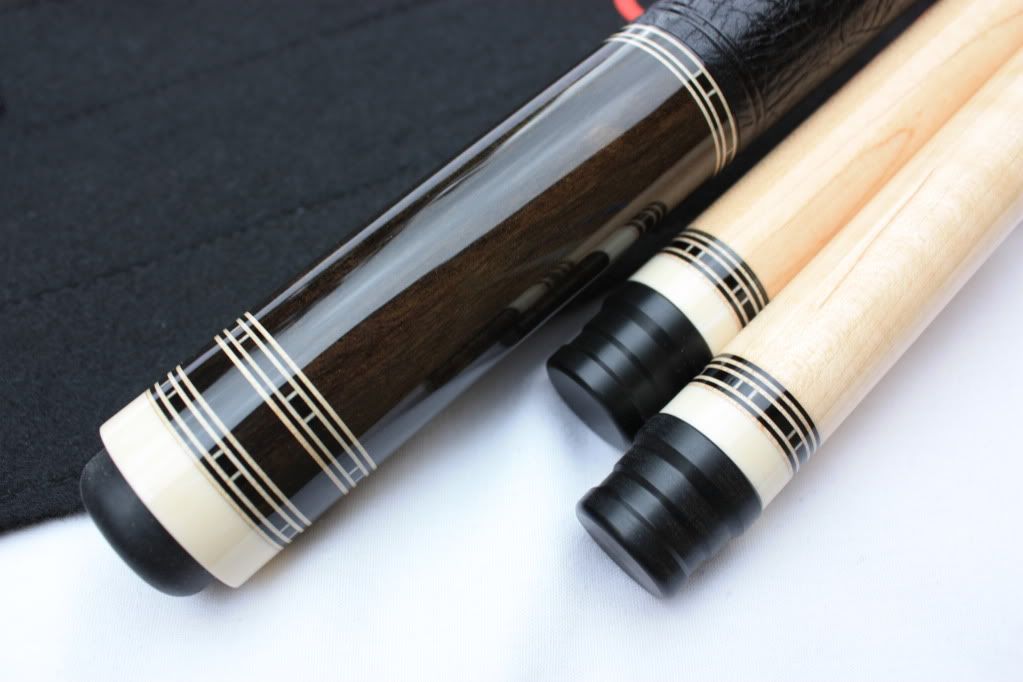
Here is the new ringwork after the I pressed the smart button
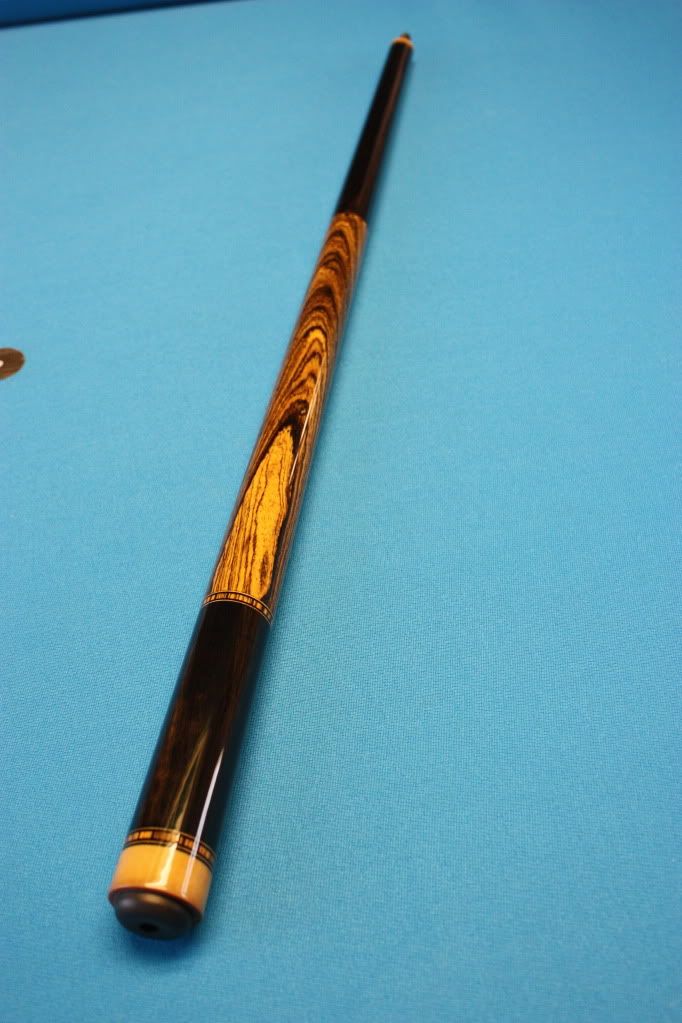
Here are more teasing pictures of some of my work:
- Attachments
-
- ringwork.crv3d
- (13 KiB) Downloaded 284 times
-
tmerrill
- Vectric Wizard
- Posts: 4797
- Joined: Thu May 18, 2006 3:24 pm
- Model of CNC Machine: ShopBot
- Location: North Carolina
Re: How to use and setup rotary angles
Sounds good!
I don't play pool, but keep posting pictures - I do appreciate quality workmanship like you do.
Tim
I don't play pool, but keep posting pictures - I do appreciate quality workmanship like you do.
Tim
-
metalworkz

- Vectric Wizard
- Posts: 2463
- Joined: Mon Mar 31, 2008 3:26 am
- Model of CNC Machine: SX3 CNC, DIY 24x20 & 48x60 routers
- Location: Modesto, California 95358 USA
Re: How to use and setup rotary angles
Hello Tony,
Looks like you got some great advice from the Vectric forum members here. It is good to see some of your work posted here also.
Looks like you got some great advice from the Vectric forum members here. It is good to see some of your work posted here also.